PARTS FOR INSTALLATION:
- - Vaitrix Booster ECU Unit with Universal Harness (Basic or Pro)
- - Vehicle Specific Harness
- - Bluetooth Module Cable
- - Red Posi Tap
- - 3M sticky pads for mounting
Disconnect your negative battery terminal before proceeding with installation.


1. First we will locate the (3) sensors we will be working with. The sensors connect only one way. The Vaitrix harness connector will connect to the factory sensor, and the factory connector will attach to the female side on the Vaitrix connector.
- A. Manifold Pressure Sensor
- B. Boost Pressure Sensor (on charge pipe)
- C. Camshaft sensor, located underneath the PCV housing and vacuum pump on the side of the engine.
The vehicle specific harness will come in two sections.
1. Wiring and connectors for both pressure sensors. These connectors only go on one way, but make sure you have the connectors matched up correctly.
2. Wiring and connector for the camshaft sensor, along with a ground wire. You can connect this ground wire anywhere you have a solid ground.


2. Next, mount the Vaitrix BOOSTER ECU using the 3M pads.

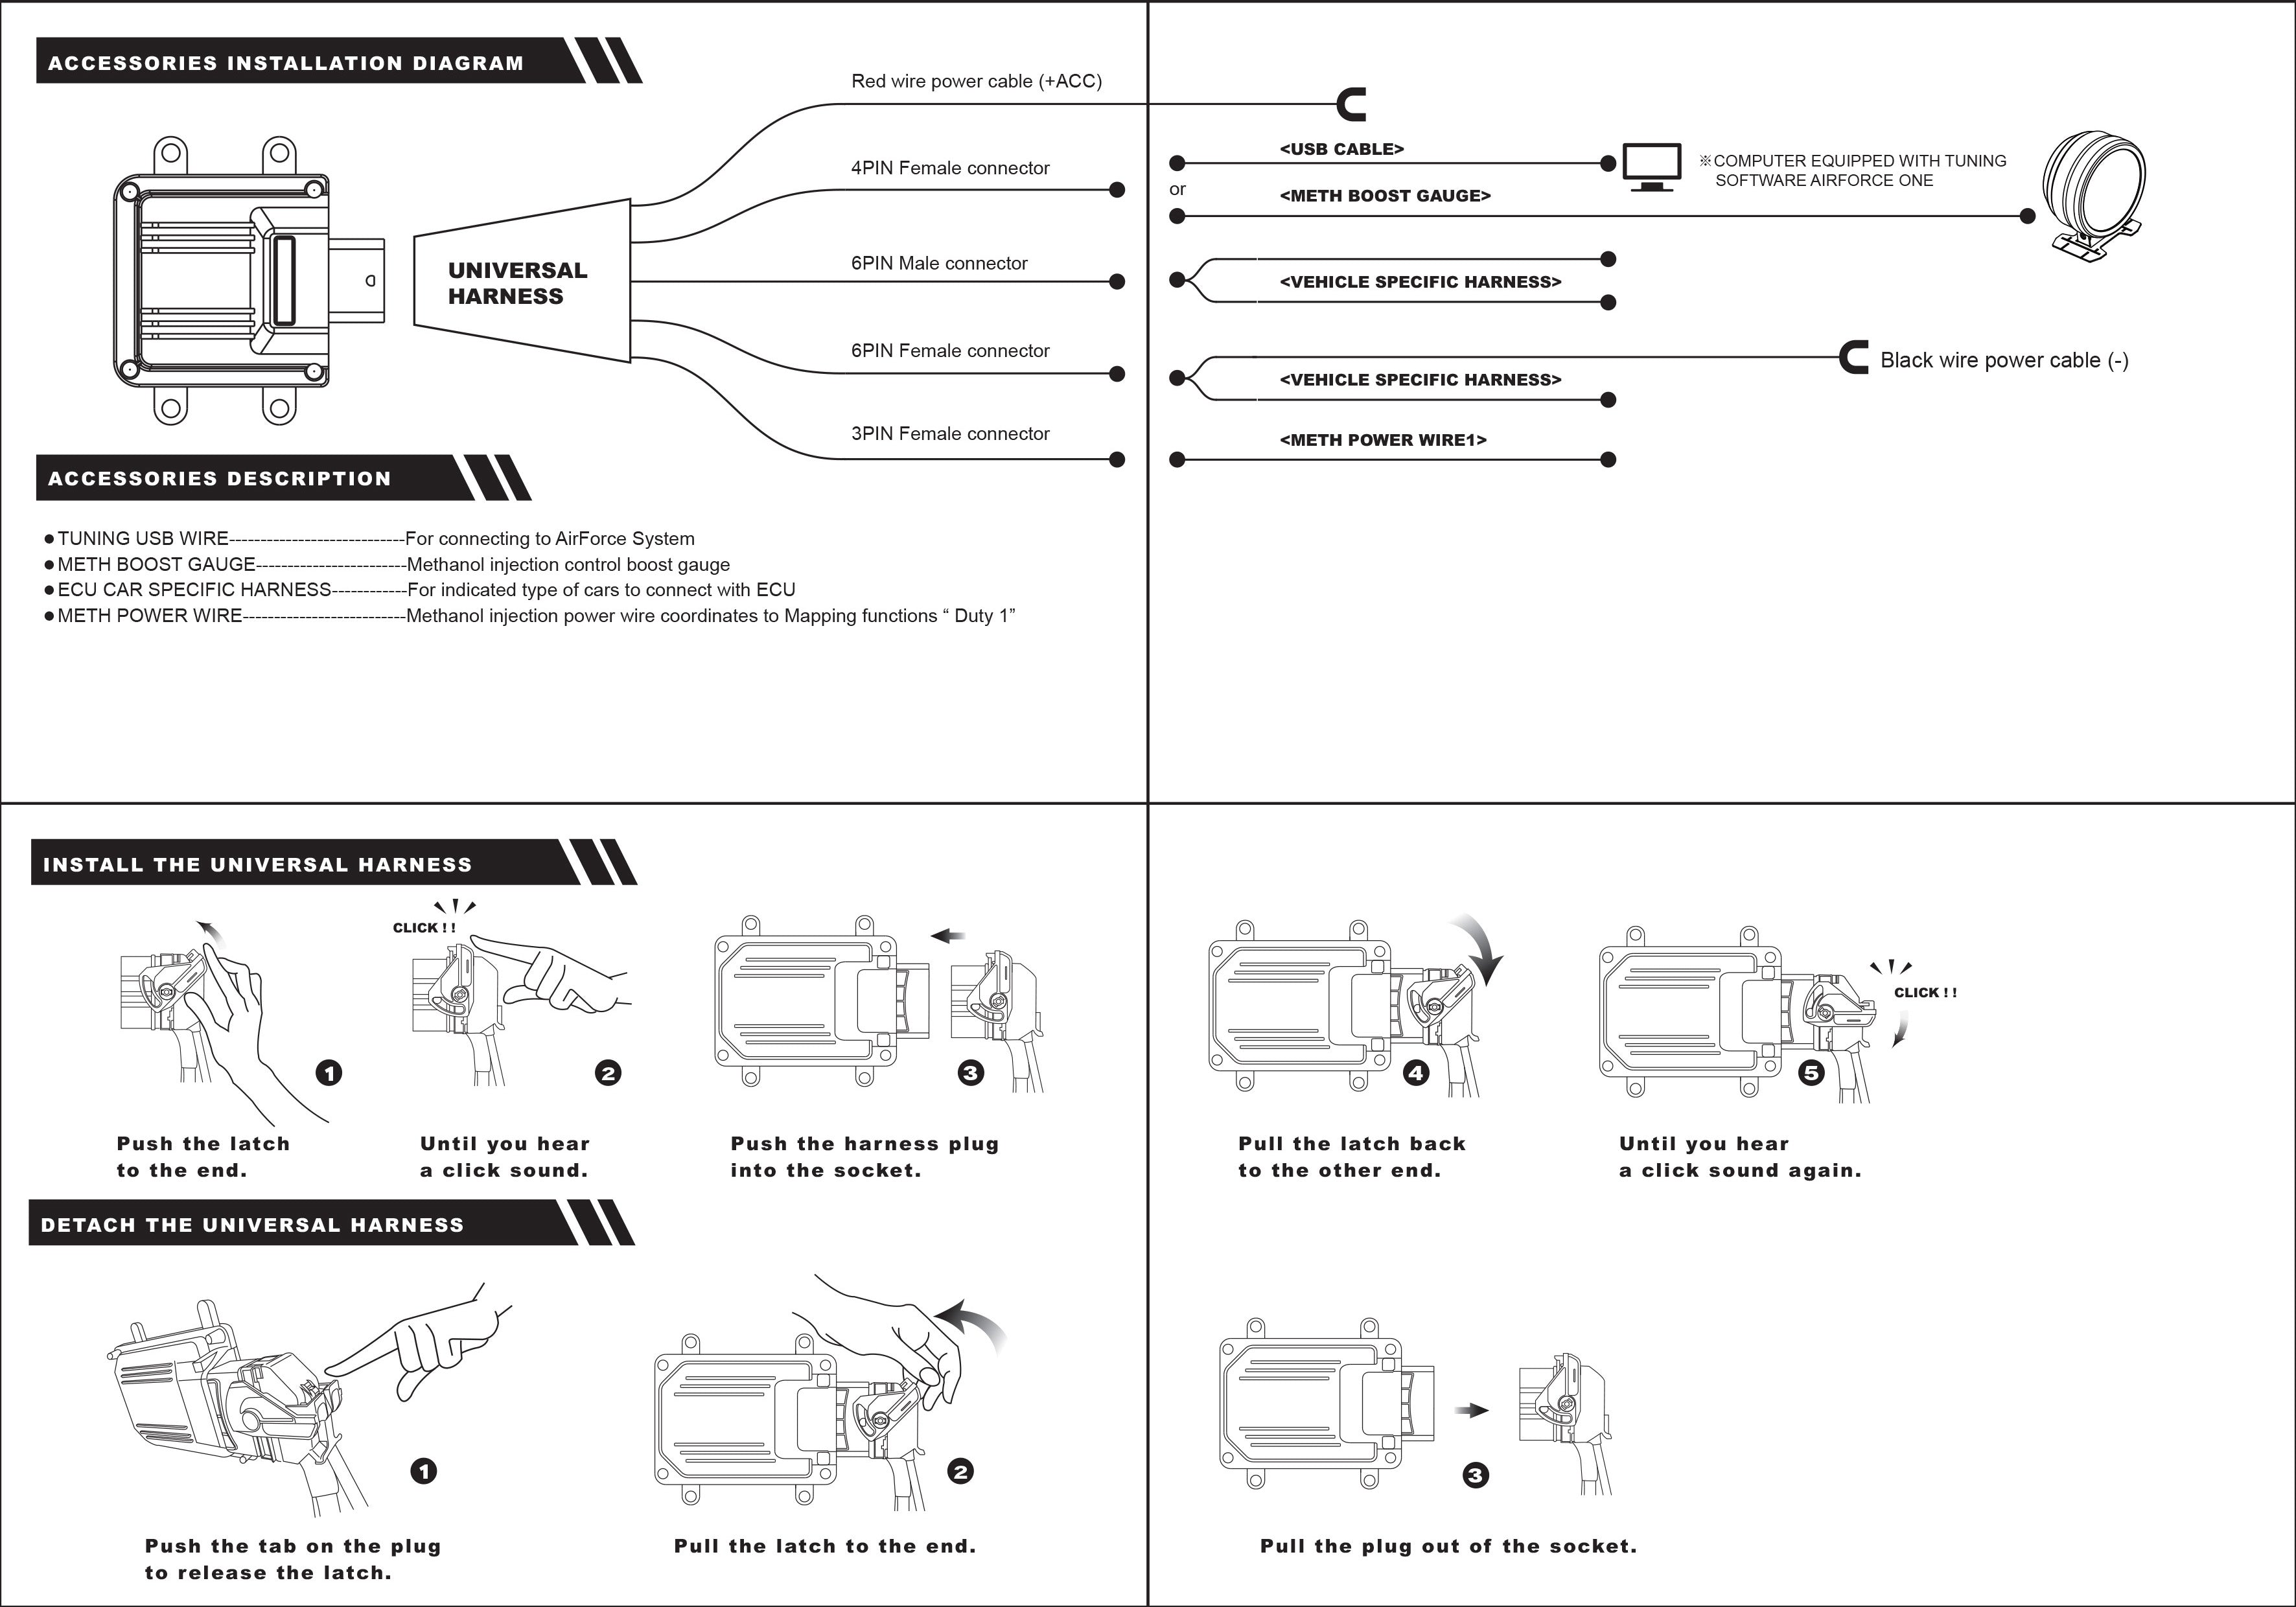
3. Take the Universal harness, and connect this to the Vaitrix Booster. The universal harness will then connect to the vehicle specific harness attached to the vehicle sensors you installed on step 1. These connectors only connect one way, and have very specific plugs, but make sure you have the correct connectors matched up with one another.
4. Next, take the red power wire from the universal harness, and use the red positap to connect to an ignition power source. Below is the recommended location, near the where the Booster is mounted and at the top back of the firewall.

5. Once all wiring is connected, reconnect the battery, and turn on the ignition. Ensure there are no CELs or DTC codes. The most common codes received with a piggyback are barometric pressure codes. If this is the case, verify your connections and your power source (either a connector is not seated or the Booster is not getting power).
6. On the Booster's universal harness, there is a shorter 4 pin connector and 2 pin connector. These will attach to the bluetooth module harness. We recommend you run the module to a location that will deliver the best signal to mobile devices while near the car.
]]>